Quantcast
Channel: Controlrede
Viewing all 4677 articles
Browse latest View live

Spice up your dice with Bluetooth

$
0
0

There’s no shortage of projects that replace your regular board game dice with an electronic version of them, bringing digital features into the real world. [Jean] however goes the other way around and brings the real world into the digital one with his Bluetooth equipped electronic dice.

These dice are built around a Simblee module that houses the Bluetooth LE stack and antenna along with an ARM Cortex-M0 on a single chip. Adding an accelerometer for side detection and a bunch of LEDs to indicate the detected side, [Jean] put it all on a flex PCB wrapped around the battery, and into a 3D printed case that is just slightly bigger than your standard die.

While they’ll work as simple LED lighted replacement for your regular dice as-is, their biggest value is obviously the added Bluetooth functionality. In his project introduction video placed after the break, [Jean] shows a proof-of-concept game of Yahtzee displaying the thrown dice values on his mobile phone. Taking it further, he also demonstrates scenarios to map special purposes and custom behavior to selected dice and talks about his additional ideas for the future.

After seeing the inside of the die, it seems evident that getting a Bluetooth powered D20 will unfortunately remain a dream for another while — unless, of course, you take this giant one as inspiration for the dimensions.


Rock Out With The Nod Bang

$
0
0

In our years here on Hackaday, we’ve seen our fair share of musical hacks. They even have their own category! (Pro Tip – you can find it under the drop down menu in the Categories section). But this one takes the cake. [Andrew Lee] is a student at New York University who had a task of creating a project for his physical computing class. In about 60 days time; he went from dinner napkin sketch to working project. The project is quite interesting – he’s made an instrument that plays music as you move your head.

It works as you would expect. An accelerometer in the user’s headphones feed data to an arduino. There are four (3D printed of course) buttons that are used to select the the type of audio being played. The operation goes as such:

  1. Press button.
  2. Bang head.

[Andrew] speaks of a particular satisfaction of hearing the music play in sync with the rhythm of head movement.  Be sure to check out the video below to see the Nod Bang in action.

Tapping into a Ham Radio’s Potential with SDRPlay

$
0
0

Software-defined radios are great tools for the amateur radio operator, allowing visualization of large swaths of spectrum and letting hams quickly home in on faint signals with the click of a mouse. High-end ham radios often have this function built in, but by tapping into the RF stage of a transceiver with an SDR, even budget-conscious hams can enjoy high-end features.

With both a rugged and reliable Yaesu FT-450D and the versatile SDRPlay in his shack, UK ham [Dave (G7IYK)] looked for the best way to link the two devices. Using two separate antennas was possible but inelegant, and switching the RF path between the two devices seemed clumsy. So he settled on tapping into the RF stage of the transceiver with a high-impedance low-noise amplifier (LNA) and feeding the output to the SDRPlay. The simple LNA was built on a milled PCB. A little sleuthing with the Yaesu manual — ham radio gear almost always includes schematics — led him to the right tap point in the RF path, just before the bandpass filter network. This lets the SDRPlay see the signal before the IF stage. He also identified likely points to source power for the LNA only when the radio is not transmitting. With the LNA inside the radio and the SDRPlay outside, he now has a waterfall display and thanks to Omni-Rig remote control software, he can tune the Yaesu at the click of a mouse.

If you need to learn more about SDRPlay, [Al Williams]’ guide to GNU Radio and SDRPlay is a great place to start.

Making Rubber Stamps with OpenSCAD

$
0
0

There’s an old saying that goes “If you can’t beat ’em, join ’em”, but around these parts a better version might be “If you can’t buy ’em, make ’em”. A rather large portion of the projects that have graced these pages have been the product of a hacker or maker not being able to find a commercial product to fit their needs. Or at the very least, not being able to find one that fit their budget.

GitHub user [harout] was in the market for some rubber stamps to help children learn the Armenian alphabet, but couldn’t track down a commercially available set. With a 3D printer and some OpenSCAD code, [harout] was able to turn this commercial shortcoming into a DIY success story.

Filling the molds with urethane rubber.

Rather than having to manually render each stamp, he was able to come up with a simple Bash script that calls OpenSCAD with the “-D” option. When this option is passed to OpenSCAD, it allows you to override a particular variable in the .scad file. A single OpenSCAD file is therefore able to create a stamp of any letter passed to it on the command line. The Bash script uses this option to change the variable holding the letter, renders the STL to a unique file name, and then moves on to the next letter and repeats the process.

This procedural generation of STLs is a fantastic use of OpenSCAD, and is certainly not limited to simple children’s stamps. With some improvements to the code, the script could take any given string and font and spit out a ready to print mold.

With a full set of letter molds generated, they could then be printed out and sealed with a spray acrylic lacquer. A mold release was applied to each sealed mold, and finally they were filled with approximately 200ml of Simpact urethane rubber from Smooth-On. Once the rubber cures, he popped them out of the molds and glued them onto wooden blocks. The end result looks just as good as anything you’d get from an arts and crafts store.

The process used here is very similar to the 3D printed cookie molds we’ve covered recently, though we have to assume these little morsels would not be nearly as tasty. Of course, if you had access to a small CNC machine you could cut the stamps out of the rubber directly and skip the mold step entirely.

Fully-functional Oscilloscope on a PIC

$
0
0

When troubleshooting circuits it’s handy to have an oscilloscope around, but often we aren’t in a lab setting with all of our fancy, expensive tools at our disposal. Luckily the price of some basic oscilloscopes has dropped considerably in the past several years, but if you want to roll out your own solution to the “portable oscilloscope” problem the electrical engineering students at Cornell produced an oscilloscope that only needs a few knobs, a PIC, and a small TV.

[Junpeng] and [Kevin] are taking their design class, and built this prototype to be inexpensive and portable while still maintaining a high sample rate and preserving all of the core functions of a traditional oscilloscope. The scope can function anywhere under 100 kHz, and outputs NTSC at 30 frames per second. The user can control the ground level, the voltage and time scales, and a trigger. The oscilloscope has one channel, but this could be expanded easily enough if it isn’t sufficient for a real field application.

All in all, this is a great demonstration of what you can accomplish with a microcontroller and (almost) an engineering degree. To that end, the students go into an incredible amount of detail about how the oscilloscope works since this is a design class. About twice a year we see a lot of these projects popping up, and it’s always interesting to see the new challenges facing students in these classes.

Living On The Moon: The Challenges

$
0
0

Invariably when we write about living on Mars, some ask why not go to the Moon instead? It’s much closer and has a generous selection of minerals. But its lack of an atmosphere adds to or exacerbates the problems we’d experience on Mars. Here, therefore, is a fun thought experiment about that age-old dream of living on the Moon.

Inhabiting Lava Tubes

Lava tube with collapsed pits near Gruithuisen craterLava tube with collapsed pits near Gruithuisen crater

The Moon has even less radiation protection than Mars, having practically no atmosphere. The lack of atmosphere also means that more micrometeorites make it to ground level. One way to handle these issues is to bury structures under meters of lunar regolith — loose soil. Another is to build the structures in lava tubes.

A lava tube is a tunnel created by lava. As the lava flows, the outer crust cools, forming a tube for more lava to flow through. After the lava has been exhausted, a tunnel is left behind. Visual evidence on the Moon can be a long bulge, sometimes punctuated by holes where the roof has collapsed, as is shown here of a lava tube northwest from Gruithuisen crater. If the tube is far enough underground, there may be no visible bulge, just a large circular hole in the ground. Some tubes are known to be more than 300 meters (980 feet) in diameter.

Lava tubes as much as 40 meters (130 feet) underground can also provide thermal stability with a temperature of around -20°C (-4°F). Having this stable, relatively warm temperature makes building structures and equipment easier. A single lunar day is on average 29.5 Earth days long, meaning that we’ll get around 2 weeks with sunlight followed by 2 weeks without. During those times the average temperatures on the surface at the equator range from 106°C (224°F) to -183°C (-298°F), which makes it difficult to find materials to withstand that range for those lengths of time.

But living underground introduces problems too.

Communication

One problem with living underground is that makes it difficult to communicate from one location to another, perhaps even between different lava tubes. To overcome this, cables could be run through the tubes and antennas could be located on the surface.

Lava tubes are often found on the boundaries between the highlands and the mares. Lunar mares are the uniform dark areas visible from Earth with the naked eye, mare being Latin for “sea”. The antennas could be located high up in those highlands. Ideally, there would always be at least one communications satellite within communications range and a network of them for transmitting anywhere on the Moon.

Electrical Ground And Charged Dust

The moisture in Earth soil aids conductivity by helping ions move around, making for a good electrical ground. Lunar soil, however, is dry and therefore is a poor electrical ground. Connecting structures together with cables can at least bring those structure to a common potential, creating a sort of ground.

Schmitt's dusty suit while retrieving samples from the MoonSchmitt’s dusty suit while retrieving samples

But a bigger problem than that is moon dust. Apollo astronauts found that the dust clung to everything and they brought it with them into the lander. Harrison “Jack” Schmitt of Apollo 17, reacted to it strongly, saying that it caused his turbinates (long, narrow bone in the nose) to swell, though the effect diminished after a few hours. Even the vacuum cleaner they used to clean up the dust became clogged.

This dust also becomes charged by solar storms, only to then be discharged when solar radiation knocks the extra electrons off, but that discharging doesn’t happen during the long nights. Inferring from data collected by the Lunar Prospector during orbits in 1998-1999, charging also happens when the Moon passes through the Earth’s magnetic wake created by the solar wind. This happens in 18-year cycles and is currently at its peak.

With the Earth’s and Mars’ atmospheres, built up charge can be bled off to the atmosphere using sharp metal points which ionize the surrounding air. On the Moon, that approach is far less effective. Using all dwellings as a ground at least provides a large capacitor to take up stray charge. If you know of a good solution to this problem, we’d like to hear it.

Producing Oxygen From Soil

We’ll of course need oxygen to breathe and one source is the lunar soil. The process usually involves reacting certain oxygen-bearing minerals with hydrogen while heating to around 1000°C. Much work has been done with the mineral ilmenite (FeTiO3), making the process:

FeTiO3 + H2 + heat -> Fe + TiO2 + H2O

Locations on the Moon of lava tubes for living in and areas where there's ilmenite.Where to live and mine

This gives us water vapor which would be separated from the other components. We could then use the water as is, or we could use electrolysis to split apart the hydrogen and oxygen. We’d condense the oxygen for storage, and recycle the hydrogen back into the process. Hydrogen is scarce on the Moon and so the hydrogen could initially be shipped from Earth and then continuously recycled.

This ilmenite is abundant on the Moon, first having been found in moon rocks returned by the Apollo astronauts, and then other locations have been inferred by the Hubble Space Telescope, one such being in the area of Aristarchus crater. Luckily that’s also near the lava tubes with collapsed pits which we’d mentioned above near Gruithuisen crater. However, for abundant water, we’ll need to look to the north and south poles.

Water From The Poles

The Moon's south pole showing craters in permanent darknessSouth pole

The evidence is very strong that there’s a mix of hydroxyl (OH) and water (H2O) on the Moon’s surface. The theories are that it comes from comets impacting on the Moon and from hydrogen ions created when the solar wind interacts with oxygen in the soil.

But for most of the Moon, solar radiation would then free the hydrogen and oxygen atoms from their molecules and they would escape to space. However, the lunar poles have areas which are in perpetual shadow, forever free of the hydrogen-liberating solar radiation. After decades of spacecraft probing these regions, the evidence for water and hydroxyls there is very strong, though the quantity of it is still uncertain.

This means that a good location for a lunar mining outpost would be in sunlit areas adjacent to these areas of perpetual shadow. There are even some such locations around the poles that are high enough to be in perpetual sunlight. And that perpetual sunlight is ideal for generating electricity using solar panels which we could manufacture on the Moon from mined minerals.

Mining And Manufacturing

Astrobotics' Polaris lunar mining test vehiclePolaris lunar mining test vehicle via Astrobotics

The Moon is lacking in volatile chemicals, ones that have a low boiling point, having negligible amounts of hydrogen, nitrogen, and carbon. But it is rich in many other chemicals and minerals. Mining them is important for two reasons: for building the things we need and for exporting to the other off-Earth colonies either in raw form or in manufactured products.

We’ve already mentioned using ilmenite (FeTiO3) to produce oxygen, but the byproducts of that are iron (Fe) and titanium (Ti), both of which can be used for the construction of living spaces, vehicles and other rigid objects.

Examining a table of Earth and lunar crustal composition, you’ll see that the Moon contains an abundance of useful minerals.

Earth and lunar crustal compositionsEarth and lunar crustal compositions from LRU for Space Construction – 1979

The silicon can be used for producing solar cells along with phosphorus and boron for the dopants. The study that produced the table doesn’t include boron, but other studies have found it in Moon rock, albeit in the 25 PPM and lower range and so it may have to be imported.

Helium 3 distribution on the MoonHelium 3 distribution via Lunar Networks

Helium 3 is another valuable substance that can be mined on the Moon. The Chinese Chang-E1 lunar satellite estimated the amount in lunar regolith as 660 billion kg. It’s hoped that it can be used for future fusion reactors due to that fusion producing no radiation and more energy than other fusion reactions. However, it also requires a higher temperature. Just 6,700 kg would be required to power the US for one year. Luckily helium 3 is in abundance in the same area where we’ll be mining ilmenite.

Generating Electricity

We’ve already mentioned that there are areas around the poles that are in perpetual sunlight. So during the long nights, solar power farms in those areas could generate electricity as a product to sell throughout the Moon.

Geothermal energy isn’t an option for the Moon, at least not for the colonies’ early days as you’d have to drill down around 45 km (28 miles) before the temperature reaches the boiling point of water. Geothermal energy has been used to generate electricity in Chena Hot Springs, Alaska with only 57°C (135°F) but that’s still around 20 km (12.5 miles) deep.

If helium 3 fusion is ever made to work then it could be used to provide electricity through the long lunar night when the local solar farms are down. And it might have to, because uranium is in short supply on the Moon.

Home Sweet Home

And so we’ll have a central colony in the lava tubes near Gruithuisen crater. Some of the inhabitants will spend time mining ilmenite just a little south around the Aristarchus crater to produce oxygen and mineral byproducts. Meanwhile, others will spend time working on the water mines at the north pole and maintaining the solar power farms there which sit in the perpetual sunlight.

When will you be ready to move? What would you do differently? We haven’t even touched on growing food, which will have its own challenges given the lack of volatiles such as nitrogen. What other issues can you think of? Let us know in the comments below.

How Mini Can A Mini Lamp Be?

$
0
0

If there is one constant in the world of making things at the bench, it is that there is never enough light. With halogen lamps, LEDs, fluorescent tubes, and more, there will still be moments when the odd tiny part slips from view in the gloom.

It’s fair to say that [OddDavis]’ articulated mini lamp will not provide all the solutions to your inadequate lighting woes, as its lighting element is a rather humble example of a white LED and not the retina-searing chip you might expect. The lamp is, after all, an entry in our coin cell challenge, so it hardly has a huge power source to depend upon.

What makes this lamp build neat is its 3D-printed articulated chassis. It won’t replace your treasured Anglepoise just yet, but it might make an acceptable alternative to that cheap IKEA desk lamp. With the coin cell LED you’d be hard pressed to use it for much more than reading even with its aluminium foil reflector, but given a more substantial lighting element it could also become a handy work light.

If 3D printed articulated lamps are your thing, take a look at this rather more sophisticated example.

Maria Mitchell: The First Woman Astronomy Professor

$
0
0

On an October night in 1847, a telescope on the roof of the Pacific National Bank building on Nantucket Island was trained onto the deep black sky. At the eyepiece was an accomplished amateur astronomer on the verge of a major discovery — a new comet, one not recorded in any almanac. The comet, which we today know by the dry designator C/1847 T1, is more popularly known as “Miss Mitchell’s Comet,” named after its discoverer, a 29-year old woman named Maria Mitchell. The discovery of the comet would, after a fashion, secure her reputation as a scholar and a scientist, but it was hardly her first success, and it wouldn’t be her last by a long shot.

Maria Mitchell. Source: The Nantucket Atheneum

To say that Maria Mitchell’s life did not follow the typical path of a 19th-century woman’s life is something of an understatement. Nantucket Island was still decades away from the brief burst of prosperity it would find in the rise of the whaling trade when Maria — she pronounced her name with a long “I” sound — was born in 1818. Her parents were Quakers and much involved in Maria’s education, at a time when girls were not necessarily afforded the same opportunities as boys.

It was Maria’s father who would turn her eyes to the skies and serve as her mentor. William Mitchell was an educator, being principal of Maria’s grammar school and later starting his own school. He also had a keen interest in surveying and, suitably enough for life on a seafaring island, navigation and astronomy. William taught Maria how to use navigation instruments, with which she made observations and calculations. By the time she was 14, Maria’s navigational calculations were in demand by the island’s sailors as they set out on their journeys.

At the end of her formal education in 1836, Maria became the librarian of the brand new Nantucket Atheneum. A mix of library and museum, the Atheneum was to be a cultural and intellectual institution, and Maria would remain there for twenty years. With her father, she continued her studies of the heavens, with bigger and better instruments.

Miss Mitchell’s Comet

Maria’s comet discovery in 1847 was not without controversy. In 1832, Danish king Frederick VI established a gold medal prize for anyone who discovered a comet using a telescope. Maria was not alone in observing the comet that would bear her name. On October 3, 1847, Italian astronomer and Jesuit priest Francesco de Vico observed the same comet, quickly wrote up his findings, and posted them to the award committee. Being closer, news of the discovery reached Denmark sooner, and de Vico was awarded the medal. However, Maria had made her observations on October 1, and when the news eventually reached Europe, the prize was awarded to her.

“Miss Mitchell’s Comet” earned Maria a degree of international fame, and while she hated the attention, it provided her with opportunities. After resigning from the Atheneum, Maria traveled around the world, making observations at the Vatican Observatory and conducting several expeditions to study eclipses. As Maria’s reputation grew, she began to accumulate honors — in 1848, she was the first woman to be elected to the American Academy of Arts and Sciences, and two years later to the American Association for the Advancement of Science.

Founder and Pioneer

Maria Mitchell (standing 3rd from right) and her first astronomy class at Vassar. Source: Vassar College

In 1865, Maria, who never married, moved to Poughkeepsie, New York to the campus of the newly founded Vassar College, the first degree-granting college for women in the United States. Maria would become the first faculty member hired, and along with her widowed father, she lived in the observatory that was built to her specifications to house the second largest telescope in the country at the time.

Her students were expected to do original research in the observatory and in the field, a novelty at the time for students at men’s colleges and unheard of for women students. She traveled with her students to Iowa in 1869 to observe a total solar eclipse, and again to 1878 for another eclipse in Colorado. Such trips were difficult and dangerous in those days, and the sight of a group of women lugging scientific instruments into a frontier town in the midst of a gold rush must have been something to see.

Maria continued teaching and making observations right up until she retired in 1888 due to poor health; she would die a year later at the age of 70. Her contributions to astronomy are many; along with her comet discovery and her eclipse observations, she and her students built an apparatus for making solar photographs and made important observations about sunspots. But perhaps her most important contribution was as an educator and a mentor to her students, just as her father mentored her.


Christal Gordon: Sensors, Fusion, and Neurobiology

$
0
0

Some things don’t sound like they should go together, but they do. Peanut butter and chocolate. Twinkies and deep frying. Bacon and maple syrup. Sometimes mixing things up can produce great results. [Dr. Christal Gordon’s] expertise falls into that category. She’s an electrical engineer, but she also studies neuroscience. This can lead to some interesting intellectual Reese’s peanut butter cups.

At the 2017 Hackaday Superconference, [Christal] spoke about sensor fusion. If you’ve done systems that have multiple sensors, you’ve probably run into that before even if you didn’t call it that. However, [Christal] brings the perspective of how biological systems fuse sensor data contrasted to how electronic systems perform similar tasks. You can see a video replay of her talk in the video below.

The precise definition of sensor fusion is taking data from multiple sensors to reduce uncertainty about measurements. For example, an autonomous car might want to measure its position relative to other objects to navigate and avoid collisions. GPS will give you a pretty good idea of where you are. However, you can better understand your position within the uncertainty of GPS using inertial methods although they tend to accumulate errors over larger time periods. By using both sources of data, it is possible to get a better idea of position than trying to use either one individually.

Another source of data might be a LIDAR or ultrasonic range finder. Fusion correlates all this data to develop a better operating picture of the environment. Navigation isn’t the only application, of course. [Christal] mentions several others, including fusing data to allow robotic legs to run on a treadmill.

One very important sensor fusion tool that [Christal] mentions is the Kalman filter. This algorithm takes multiple noisy sensor inputs with varying degrees of certainty and arrives at an estimate of the value that is more precise than the sensor inputs alone.

It makes sense that we would look to biological systems for inspiration for sensor fusion. After all, the best fusing system we know of is the human brain. Your brain processes data from a dizzying array of sensors and allows you to make sense of your world. It isn’t perfect, but it does work pretty well most of the time. Think about the navigation ability of, say, a migratory bird. Now think about the size and weight of that bird. Then realize the bird is self-fueling and can — with a little help — produce more birds. Pretty amazing. Our robots are lucky if they can navigate that well and they probably don’t refuel and rebuild plus they probably are much bigger and heavier.

There’s only so much you can cover in 40 minutes, but [Christal] will make you think about how our systems resemble biological systems and the ways we can combine data from multiple sources to get better sensor data in machines.

One of the great things about Superconference is being exposed to new ideas from people who have very different perspectives. [Christal’s] talk is a great example, and thanks to the magic of the Internet, you can watch it in your own living room.

Old TV Lends Case to Retro Magic Mirror

$
0
0

Remember the days when the television was the most important appliance in the house? On at dawn for the morning news and weather, and off when Johnny Carson said goodnight, it was the indispensable portal to the larger world. Broadcast TV may have relinquished its hold on the public mind in favor of smartphones, but an information portal built into an old TV might take you back to the old days.

It seems like [MisterM] has a little bit of a thing for the retro look. Witness the wallpaper in the video after the break for proof, as well as his Google-ized Radio Shack intercom project from a few months back. His current project should fit right in, based on an 8″ black-and-white TV from the 70s as it is. TVs were bulky back then to allow for the long neck of the CRT, so he decided to lop off the majority of the case and use just the bezel for his build. An 8″ Pimoroni display sits where the old tube once lived, and replicates the original 4:3 aspect ratio. With Chromium set up in kiosk mode, the family can quickly select from a variety of news and information “channels” using the original tuning knob, while parts from a salvaged mouse turns the volume control into a scroll wheel.

It’s a nice twist on the magic mirror concept, and a little different from the other retro-TV projects we’ve seen, like a retro gaming console or an old-time case for a smart TV.

Accident Forgiveness Comes to GPLv2

$
0
0

Years ago, while the GPLv3 was still being drafted, I got a chance to attend a presentation by Richard Stallman. He did his whole routine as St IGNUcius, and then at the end said he would be answering questions in a separate room off to the side. While the more causal nerds shuffled out of the presentation room, I went along with a small group of free software aficionados that followed our patron saint into the inner sanctum.

When my turn came to address the free software maestro, I asked what advantages the GPLv3 would have to a lowly hacker like myself? I was familiar with the clause about “Tivoization“, the idea that any device running GPLv3 code from the manufacturer should allow the user to be able to install their own software on it, but this didn’t seem like the kind of thing most individuals would ever need to worry about. Was there something in the new version of the GPL that would make it worth adopting in personal or hobby projects?

Yes, he really dresses up like this.

Interestingly, a few years after this a GPLv2 program of mine was picked up by a manufacturer and included in one of their products (never underestimate yourself, folks). So the Tivoization clause was actually something that did apply to me in the end, but that’s not the point of this story.

Mr. Stallman responded that he believed the biggest improvement GPLv3 made over v2 for the hobbyist programmer was the idea of “forgiveness” in terms of licensing compliance. Rather than take a hard line approach like the existing version of the GPL, the new version would have grace periods for license compliance. In this way, legitimate mistakes or misunderstandings of the requirements of the GPL could be resolved more easily.

So when I read the recent announcement from Red Hat that said they would be honoring the grace period for GPLv2 projects, I was immediately interested. Will the rest of the community follow Red Hat’s lead? Will this change anyone’s mind when deciding between the GPL v2 and v3? Is this even a good idea? Join me below as I walk through these questions.

Defining Forgiveness

The title of the Red Hat announcement is “Providing a Fair Chance to Correct Mistakes”, which is basically the perfect way to summarize the grace period added to the GPLv3. But for our purposes, let’s take a look at the full text, taken from the “Termination” clause of the GPLv3:

You may not propagate or modify a covered work except as expressly provided under this License. Any attempt otherwise to propagate or modify it is void, and will automatically terminate your rights under this License (including any patent licenses granted under the third paragraph of section 11).

However, if you cease all violation of this License, then your license from a particular copyright holder is reinstated (a) provisionally, unless and until the copyright holder explicitly and finally terminates your license, and (b) permanently, if the copyright holder fails to notify you of the violation by some reasonable means prior to 60 days after the cessation.

Moreover, your license from a particular copyright holder is reinstated permanently if the copyright holder notifies you of the violation by some reasonable means, this is the first time you have received notice of violation of this License (for any work) from that copyright holder, and you cure the violation prior to 30 days after your receipt of the notice.

OK, so what does that mean?

Basically, the first paragraph is saying that if you distribute a GPLv3 covered work and violate any of the license terms, you forfeit your license and therefore the right to distribute the work. Under the GPLv2, this would have been the end of the road. You broke the license, now deal with it.

But the next paragraphs give you a way back. It says that if you stop violating the license, and the upstream license holder (generally speaking, the original developer) doesn’t want to push the issue, your rights are reinstated. Further, if you fix your license violation in a timely manner (30 days) after the original developer notifies you, and assuming you aren’t a repeat offender, then you’re also in the clear.

It’s important to note that this clause protects you whether or not the license holder contacts you about the violation. If you realize on your own that you messed up and fix it, you’re covered. If they do contact you, you just need to fix the issue within a reasonable amount of time.

GPL: TL;DR

This may not seem like that big of a deal at first. After all, how hard is it to follow the terms of the license, right? Well, if we were talking about something simple like the 3-Clause BSD license, then no problem. But the GPL is a considerably more wordy license than others, and also asks more of the user.

Did you include a full copy of the license with the program? Does each source code file in the program contain a header that says it’s licensed under the GPL? Did you make sure all of the files modified from the upstream version contained dated comments that highlight the changes you made? If you’re distributing only a binary, did you make sure the source is hosted somewhere that the user can reasonably find it?

These are just a handful of the requirements contained in the ~2,500 word GPLv2. It’s easy to see how somebody who is not well versed in the license could easily skip some of the more esoteric requirements, especially in the click-and-fork era of GitHub. Any one of these infractions could (at least in theory) lead to forfeiture of your rights as granted by the license.

But with the clauses added to the GPLv3, these problems can be solved with a simple email or Tweet. Notify the developer who made a mistake, give them 30 days to fix it, and the problem goes away. It’s a much friendlier way of handling licensing mistakes, made possible in part by the ease of communication we now enjoy; a situation which could hardly be imagined 30 years ago when the GPLv2 was being written.

Will Everyone Get Onboard?

The new mechanisms for handling licensing issues introduced in the GPLv3 are a benefit for developers and take some of the stress out of using the GPL, and retroactively honoring them for older versions of the GPL is no doubt a great thing for the community. But will it stick?

Google, IBM, and Facebook have announced they will join Red Hat in honoring the grace period for GPLv2 covered works, and even Linux kernel developers are adopting a similar approach, but that still leaves a whole lot of companies and developers who aren’t obligated to do anything outside of what the license says. With luck, more and more companies will adopt this attitude towards supporting the GPLv2, and in time perhaps even individual developers will; but surely not all of them.

That said, the situation becomes murky when you have certain subsets of the community following the spirit of the law, and others following the letter of the law. Allowing a few heavy hitters in the industry to essentially add terms to an existing license (even if they have the best of intentions) could be seen as a slippery slope.

In the end, if you like the clauses added in the latest version of the GPL, then you should probably just use the latest version of the GPL, rather than relying on industry to pick and chose which parts they will or won’t honor. But if you can’t, or won’t, then at least there’s a chance you’ll get a pass; depending on who you deal with.

The Tiniest Of 555 Pianos

$
0
0

The 555 timer is one of that special club of integrated circuits that has achieved silicon immortality. Despite its advanced age and having had its functionality replicated and superceded in almost every way, it remains in production and is still extremely popular because it’s simply so useful. If you are of A Certain Age a 555 might well have been the first integrated circuit you touched, and in turn there is a very good chance that your project with it would have been a simple electric organ.

If you’d like to relive that project, perhaps [Alexander Ryzhkov] has the answer with his 555 piano. It’s an entry in our coin cell challenge, and thus uses a CMOS low voltage 555 rather than the power-hungry original, but it’s every bit the classic 555 oscillator with a switchable resistor ladder you know and love.

Physically the piano is a tiny PCB with surface-mount components and physical buttons rather than the stylus organs of yore, but as you can see in the video below the break it remains playable. We said it was tiny, but some might also use tinny.

We could take you to any of a huge number of 555 projects that have graced these pages over the years. But since this is a musical instrument, maybe it’s better to suggest you accompany it on a sawtooth synth, or perhaps a flute.

Statistics and Hacking: A Stout Little Distribution

$
0
0

Previously, we discussed how to apply the most basic hypothesis test: the z-test. It requires a relatively large sample size, and might be appreciated less by hackers searching for truth on a tight budget of time and money.

As an alternative, we briefly mentioned the t-test. The basic procedure still applies: form hypotheses, sample data, check your assumptions, and perform the test. This time though, we’ll run the test with real data from IoT sensors, and programmatically rather than by hand.

The most important difference between the z-test and the t-test is that the t-test uses a different probability distribution. It is called the ‘t-distribution’, and is similar in principle to the normal distribution used by the z-test, but was developed by studying the properties of small sample sizes. The precise shape of the distribution depends on your sample size.

The t distribution with different sample sizes, compared to the normal distribution (Hackaday yellow). Source: Wikipedia

In our previous example, we only dealt with the situation where we want to compare a sample with a constant value – whether a batch of resistors were the value they were supposed to be. In fact there are three common situations:

  1. You want to compare a sample to a fixed value: One sample t-test
  2. You want to compare two independent samples: Two sample t-test
  3. You have two measurements taken from each sample (e.g. treatment and control) and are interested in the difference: Paired t-test

The difference mainly affects how you might set up your experiment, although if you have two independent samples, there is some extra work involved if you have different sample sizes or one sample varies more than the other. In those cases you’re probably better off using a slight variation on the t-test called Welsh’s t-test.

In our case, we are comparing the temperature and humidity readings of two different sensors over time, so we can pair our data as long as the sensors are read at more or less the same time. Our null and alternate hypotheses are straightforward here: the sensors either don’t produce significantly different results, or they do.

The two DHT11 sensors were taped down to my desk. They were read with a NodeMCU and the data pushed to a ThingsBoard server.

Next, we can sample. The readings from both sensors were taken at essentially the same time every 10 seconds, and sent via MQTT to a Thingsboard server. After a couple of days, the average temperature recorded by each sensor over 10 minute periods was retrieved. The sensor doesn’t have great resolution (1 °C), so averaging the data out like this made it less granular. The way to do this is sort of neat in ThingsBoard.

First you set up an access token:

$curl -X POST --header 'Content-Type: application/json' --header 'Accept: application/json' -d '{"username":"yourusername", "password":"yourpassword"}' 'http://host.com:port/api/auth/login'

Then you request all data for a particular variable, averaged out every 10 minutes in JSON format (timestamps will be included):

$curl -v -X GET "http://host.com:port/api/plugins/telemetry/DEVICE/devicekey/values/timeseries?keys=variablename&startTs=1510917862000&endTs=1510983920000&interval=600000&limit=10000&agg=AVG" \
--header "Content-Type:application/json" \
--header "X-Authorization:Bearer (token goes here)" > result.txt

What’s cool about using an API like this is that you can easily automate data management and testing as parts of a decision engine. If you’re using less accurate sensors, or are just measuring something that varies a lot, using statistical significance as the basis to make a decision instead of a single sensor value can really improve reliability. But I digress, back to our data!

Next, I did a little data management: the JSON was converted to a CSV format, and the column titles removed (timestamp and temperature). That made it easier for me to process in Python. The t-test assumes normally distributed data just like the z-test does, so I loaded the data from the CSV file into a list and ran the test:

import scipy.stats as stats
import csv
import math as math
import numpy as numpy
#Set up lists
tempsensor1=[]
tempsensor2=[]
#Import data from a file in the same folder
with open('temperature1.csv', 'rb') as csvfile:
datareader = csv.reader(csvfile, delimiter=',', quotechar='|')
for row in datareader:
tempsensor1.append(float(row[1]))
with open('temperature2.csv', 'rb') as csvfile:
datareader = csv.reader(csvfile, delimiter=',', quotechar='|')
for row in datareader:
tempsensor2.append(float(row[1]))
#Subtract one list from the other
difference=[(i -j) for i, j in zip(tempsensor1, tempsensor2)]
#Test for normality and output result
normality = stats.normaltest(difference)
print "Temperature difference normality test"
print normality

In this case the normality test came back p>0.05, so we’ll consider the data normal for the purposes of our t-test. We then run our t-test on the data with the below. Note that the test is labeled ‘ttest_1samp’ in the statistics package – this is because running a 1-sample t-test on the difference between two datasets is equivalent to running a paired t-test on two datasets. We had already subtracted one list of data from the other for the normality test above, and now we’re checking if the result is significantly different from zero.

ttest = stats.ttest_1samp(difference, 0, axis=0)
mean=numpy.mean(difference)
print "Temperature difference t-test"
print ttest
print mean

The test returns a t-test statistic of -8.42, and a p-value of 1.53×10⁻¹³, which is much less than our threshold of p=0.05. The average difference was -0.364 °C. What that means is that the two sensors are producing significantly different results, and we have a ballpark figure for what the difference should be at a temperature of around 30 °C. Extrapolating that result to very different temperatures is not valid, since our data only covered a small range (29-32 °C).

I also ran the above test on humidity data, but the results aren’t interesting because according to the datasheet (PDF warning), the relative humidity calculation depends on the temperature, and we already know the two devices are measuring significantly different temperatures. One interesting point was that the data was not normally distributed – so what to do?

A commonly used technique is just to logarithmically transform the data without further consideration and see if that makes it normally distributed. A logarithmic transformation has the effect of bringing outlying values towards the average:

difference=[(math.log1p(i) - math.log1p(j)) for i, j in zip(humidity1, humidity2)]
normality = stats.normaltest(difference)
print "Humidity difference (log-transformed) normality test"
print normality

In our case, this did in fact make the data sufficiently normally distributed to run a test. However, it’s not a very rigorous approach for two reasons. First, it complicates exactly what you are comparing (what is the meaningful result if I compare the logarithm of temperature values?). Secondly, it’s easy to just throw various transformations at data to cover up the fundamental fact that your data is simply not appropriate for the test you’re trying to run. For more details, this paper points out some of the problems that can arise.

A more rigorous approach that is increasing in popularity (just my opinion on both counts), is the use of non-parametric tests. These tests don’t assume a particular data distribution. A non-parametric equivalent to the paired t-test is the Wilcoxon signed-rank test (for unpaired data use the Wilcoxon rank-sum test). It has less statistical power than a paired t-test, and it discards any datum where the difference between pairs is zero, so there can be significant data loss when dealing with very granular data. You also need more samples to run it: twenty is a reasonable minimum. In any case, our data was sufficient, and running the test in Python was simple:

import scipy.stats as stats
list1=[data__list_goes_here]
list2=[data__list_goes_here]
difference=[(i -j) for i, j in zip(list1, list2)]
result=stats.wilcoxon(difference, y=None, zero_method='wilcox', correction=False)
print result

When we ran it, the measured humidity difference was significant, with an average difference of 4.19%.

You might ask what the practical value of all this work is. This may just have been test data, but imagine I had two of these sensors, one outside my house and one inside. To save on air conditioning, a window fan turns on every time the temperature outside is cooler than the temperature inside. If I assumed the two devices were exactly the same, then my system would sometimes measure a temperature difference when there is none. By characterizing the difference between my two sensors, I can reduce the number of times the system makes the wrong decision, in short making my smart devices smarter without using more expensive parts.

As a side note, it has been overstated that it’s easy to lie with statistics. To borrow an idea from Andrejs Dunkels, the real issue is that it’s hard to tell the truth without them.

Extraterrestrial Autonomous Lander Systems to Touch Down on Mars

$
0
0

The future of humans is on Mars. Between SpaceX, Boeing, NASA, and every other national space program, we’re going to Mars. With this comes a problem: flying to Mars is relatively easy, but landing a large payload on the surface of another planet is orders of magnitude more difficult. Mars, in particular, is tricky: it has just enough atmosphere that you need to design around it, but not enough where we can use only parachutes to bring several tons down to the surface. On top of this, we’ll need to land our habitats and Tesla Roadsters inside a very small landing ellipse. Landing on Mars is hard and the brightest minds are working on it.

At this year’s Hackaday Superconference, we learned how hard landing on Mars is from Ara Kourchians (you may know him as [Arko]) and Steve Collins, engineers at the Jet Propulsion Laboratory in beautiful Pasadena. For the last few years, they’ve been working on COBALT, a technology demonstrator on how to use machine vision, fancy IMUs, and a host of sensors to land autonomously on alien worlds. You can check out the video of their Supercon talk below.

There are a few methods that have been used to land on Mars over the years. The first successful landing, Viking, in 1976, simply dropped the lander off at the top of the atmosphere with the hope of not landing on top of a gigantic boulder or on the side of a cliff. Curiosity, the car-sized rover that’s been going strong for half a decade, was a little more complex. The entry vehicle had an offset mass, and as the lander was plunging through the atmosphere, the computer could roll around its center of mass, imparting a little offset to its trajectory. This is also how the Apollo modules came back from the moon, and proof you can fly a brick, provided it doesn’t have a homogenous density.

But there are Mars rovers being built right now. The Mars 2020 rover is currently being assembled, and with that new landing techniques are needed to put the rover next to interesting geological formations. For Mars 2020, this means having the lander take pictures of the landing area during its descent through the atmosphere, compare those to maps created by one of the many Mars orbiters, and have the lander figure out if it’s going to land on a pile of rocks. If the lander senses it’s going to land in a dangerous area, it can divert its landing site a few hundred meters away towards safer terrain.

COBALT — the CoOperative Blending of Autonomous Landing Technologies — is a project to improve this technology. Eventually, we’re going to want to land on even more dangerous terrain on Mars or even Europa. These are challenging environments, and we don’t even have high-resolution maps of Europa. We probably won’t have high-resolution maps of Europa until we try to land there.

The COBALT payload package

To manage this, COBALT is a payload package loaded up with LIDAR, cameras, IMUs, and a beefy computer providing real-time sensing for where a rocket will land. The COBALT team actually got a chance to test their payload out last spring in the Mojave aboard a Masten Xodiac rocket. This rocket shot upward, turned down its engine, then moved off to the side and landed on a pad a few hundred meters downrange.

This test was a complete success. You can check out a few videos of the test from the Armstrong Flight Research Center in the Mojave where the rocket goes up, figures out where it is, and directs the engine to a precise landing point.

There will be a lot of ways we’re going to land on Mars. SpaceX is going all-in with lifting bodies and offset centers of mass. Boeing will probably go Thrust or Bust. Who knows what China and India will do. We will eventually get there, though, and when it comes to worlds other than Mars or the moon, this is probably what we’ll be using.

Guitar Game Plays with Enhanced Realism

$
0
0

There’s a lot more to learning how to play the guitar than just playing the right notes at the right time and in the right order. To produce any sound at all requires learning how to do completely different things with your hands simultaneously, unless maybe you’re a direct descendant of Eddie Van Halen and thus born to do hammer ons. There’s a bunch of other stuff that comes with the territory, like stringing the thing, tuning it, and storing it properly, all of which can be frustrating and discouraging to new players. Add in the calluses, and it’s no wonder people like Guitar Hero so much.

[Jake] and [Jonah] have found a way to bridge the gap between pushing candy colored buttons and developing fireproof calluses and enough grip strength to crush a tin can. For their final project in [Bruce Land]’s embedded microcontroller design class, they made a guitar video game and a controller that’s much closer to the experience of actually playing a guitar. Whether you’re learning to play for real or just want to have fun, the game is a good introduction to the coordination required to make more than just noise.

In an interesting departure from standard stringed instrument construction, plucking is isolated from fretting.  The player fingers notes on four strings but plucks a special, fifth string with a conductive pick that closes the plucking circuit. By contrast, the fretting strings are normally high. When pressed, they contact the foil-covered fingerboard and the circuit goes low. All five strings are made of carbon-impregnated elastic and wrapped with 30AWG copper wire.

All five strings connect to an Arduino UNO and then a laptop. The laptop sends the signal to a Bluefruit friend to change Bluetooth to UART in order to satisfy the PIC32. From there, it goes out via 2-channel DAC to a pair of PC speakers. One channel has the string tones, which are generated by Karplus-Strong. To fill out the sound, the other DAC channel carries undertones for each note, which are produced by sine tables and direct digital synthesis. There’s no cover charge; just click past the break to check it out.

If you’d like to get into playing, but don’t want to spend a lot of money to get started, don’t pass up those $30-$40 acoustics for kids, or even a $25 ukulele from a toy store. You could wind your own pickup and go electric, or add a percussive solenoid to keep the beat.


Binary Clock Build

$
0
0

This Binary Clock Build project by JD is enclosed in a custom acrylic enclosure. 3 buttons are used to adjust the time, the binary clock is displayed for your leet friends. For the regular folk there is also a time display on the LCD. The System is powered by a Parallax Popeller. With 40 pins the Propeller has enough pins to drive each LED direct, the buttons are also all connected direct. The LCD is a serial LCD so that just required one data line but there are still available pins so chances are a standard LCD would also work.


The Zombie Rises Again: Drone Registration Is Back

$
0
0

It’s a trope of horror movies that demonic foes always return. No sooner has the bad guy been dissolved in a withering hail of holy water in the denoeument of the first movie, than some foolish child in a white dress at the start of the next is queuing up to re-animate it with a careless drop of blood or something. If parents in later installments of popular movie franchises would only keep an eye on their darn kids, it would save everybody a whole lot of time!

The relevant passage can be found in section 1092(d) of the National Defense Authorization Act, on page 329 of the mammoth PDF containing the full text, and reads as follows:

(d) RESTORATION OF RULES FOR REGISTRATION AND MARKING OF UNMANNED AIRCRAFT
.—The rules adopted by the Administrator
of the Federal Aviation Administration in the matter of registration
and marking requirements for small unmanned aircraft (FAA-2015-
7396; published on December 16, 2015) that were vacated by the
United States Court of Appeals for the District of Columbia Circuit
in Taylor v. Huerta (No. 15-1495; decided on May 19, 2017) shall
be restored to effect on the date of enactment of this Act.

This appears to reverse the earlier decision of the court, but does not specify whether there has been any modification to the requirements to prevent their being struck down once more by the same angle of attack. In particular, it doesn’t change any of the language in the FAA Modernization Act of 2012, which specifically prevents the Agency from regulating hobby model aircraft, and was the basis of Taylor v. Huerta. Maybe they are just hoping that hobby flyers get fatigued?

We took a look at the registration system before it was struck down, and found its rules to be unusually simple to understand when compared to other aviation rulings, even if it seemed to have little basis in empirical evidence. It bears a resemblance to similar measures in other parts of the world, with its 250 g weight limit for unregistered machines. It will be interesting both from a legal standpoint to see whether any fresh challenges to this zombie law emerge in the courts, and from a technical standpoint to see what advances emerge from Shenzhen as the manufacturers pour all their expertise into a 250 g class of aircraft.

Thanks [ArduinoEnigma] for the tip.

Friday Hack Chat: Eagle One Year Later

$
0
0

Way back in June of 2016, Autodesk acquired Cadsoft, and with it EagleCAD, the popular PCB design software. There were plans for some features that should have been in Eagle two decades ago, and right now Autodesk is rolling out an impressive list of features that include UX improvements, integration with MCAD and Fusion360, and push and shove routing.

Six months into the new age of Eagle, Autodesk announced they would be changing their licensing models to a subscription service. Where you could pay less than $100 once and hold onto version 6.0 forever, now you’re required to pay $15 every month for your copy of Eagle. Yes, there’s still a free, educational version, but this change to a subscription model caused much consternation in the community when announced.

For this week’s Hack Chat, we’re going to be talking about Eagle, one year in. Our guest for this Hack Chat is Matt Berggren, director of Autodesk Circuits, hardware engineer, and technologist that has been working on bringing electronic design to everyone. We’ll be asking Matt all about Eagle, with questions including:

  • What new features are in the latest edition of Eagle?
  • What’s on the Eagle wishlist?
  • What technical challenges arise when designing new features?
  • Where can a beginner find resources for designing PCBs in Eagle?

Join the chat to hear about new features in Eagle, how things are holding up for Eagle under new ownership, and how exactly the new subscription model for Eagle is going. We’re looking for questions from the community, so if you have a question for Matt or the rest of the Eagle team, put it on the Hack Chat event page.

If you’re wondering about how Altium and KiCad are holding up, or have any questions about these PCB design tools, don’t worry: we’re going to have Hack Chats with these engineers in the new year.

join-hack-chat

Our Hack Chats are live community events on the Hackaday.io Hack Chat group messaging. This Hack Chat is going down on noon, PST, Friday, December 15th. Time Zones got you down? Here’s a handy count down timer!

Click that speech bubble to the left, and you’ll be taken directly to the Hack Chat group on Hackaday.io.

You don’t have to wait until Friday; join whenever you want and you can see what the community is talking about.

Using Gmail with OAUTH2 in Linux and on an ESP8266

$
0
0

One of the tasks I dread is configuring a web server to send email correctly via Gmail. The simplest way of sending emails is SMTP, and there are a number of scripts out there that provide a simple method to send mail that way with a minimum of configuration. There’s even PHP mail(), although it’s less than reliable.

Out of the box, Gmail requires OAUTH2 for authentication and to share user data, which has the major advantage of not requiring that you store your username and password in the application that requires access to your account. While they have an ‘allow less secure apps’ option that allows SMTP access for legacy products like Microsoft Outlook, it just doesn’t seem like the right way forward. Google documents how to interact with their API with OAUTH2, so why not just use that instead of putting my username and password in plaintext in a bunch of prototypes and test scripts?

Those are the thoughts that run through my head every time this comes up for a project, and each time I’ve somehow forgotten the steps to do it, also forgotten to write it down, and end up wasting quite a bit of time due to my own foolishness. As penance, I’ve decided to document the process and share it with all of you, and then also make it work on an ESP8266 board running the Arduino development environment.

Before we continue, now would be a good time for a non-technical refresher on how OAUTH works. The main differences between OAUTH and OAUTH2 are that the latter requires HTTPS, and the access tokens that allow an application to use specific services in a user account have an expiry.

To use Gmail with OAUTH2, we will need to start with five things: An application registered in the Google APIs, its client ID and client secret, a computer running LAMP (a by-the-hour VPS works just fine here), and a domain name that points to it.

Registering an application with Google API is easy. Go to the Google API console, log in, create a new project, and enter it. Enable the Gmail API; it should be suggested on the front page.

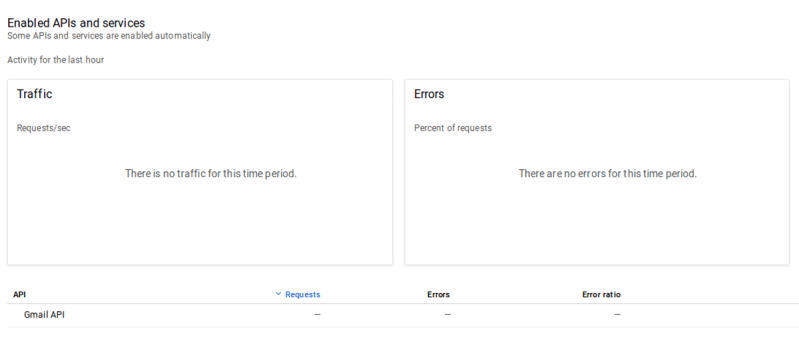
With the project created and the Gmail API enabled, the dashboard should look something like this

Then click on ‘credentials’ on the sidebar, create credentials, and finally ‘create OAUTH Client ID’. Before you can continue, you need to create a consent screen. The only entry you really need to fill out at this time is ‘Product Name Shown to Users’.

After saving that form, select ‘Web Application’ as your application type. Note the field called ‘Authorized redirect URIs’, we’ll return to it later. It’s important that it be correctly set for us to be able to receive a refresh token later on in this process.

For now, just press ‘Create’. A pop-up will display containing your Client ID and Client secret. You’ll need them soon, so best to copy/paste them into a local file on your computer for now.

Next, we will use those two pieces of data to request an access token and refresh token. We may as well accomplish two things at the same time here by installing the popular PHP email sender called PHPMailer on our web server. It includes a tool to request an OAUTH2 access/refresh token as well as being easily capable of sending a quick test email. To install it, we’ll use the Composer PHP dependency management tool:

$sudo apt-get install composer

Then we should navigate to our web-accessible directory, in my case /var/www/html, and install a few PHP scripts. Note that this should not be done as root, so create another user if needed and give them access to the directory:

$composer require phpmailer/phpmailer
$composer require league/oauth2-client
$composer require league/oauth2-google

Now enter the directory vendor/phpmailer/phpmailer. There will be a script called get_oauth_token.php. Move this script up three directories into the directory you just ran the ‘composer’ commands from. The location of this script as seen from the web needs to be entered into the ‘Authorized redirect URIs’ field of the Google API that we saw earlier. In this case it would have been https://mydomain.com/get_oauth_token.php. Public IP addresses will not work, this is why a domain name pointed to your web server is a requirement.

Now, open get_oauth_token.php in a text editor and paste in your Client ID and Client Secret where needed. Don’t try to run the script locally, it will fail. Open up a web browser on any computer, and navigate to the URL you entered as the ‘Authorized redirect URI’. Then select Google from the list of email services – at this point if it worked you will be asked to log in and then authorize the unverified application, under ‘Advanced’ under the warning prompt, at which point you will finally receive a refresh token. If you only want an access token for some reason you’ll have to edit the script to echo it back.

If that didn’t work, there are two common reasons: a wrong redirect URI or the script cannot find its dependencies. In the former case, the error message from Google will tell you the script URL as it sees it, and you can use that information to update the redirect URI in the Google API Console to fix the issue. For the latter, check your apache error log, probably located in /var/log/apache2/error.log, to see what dependency is not being found. You might see something like this:

PHP Warning: require(vendor/autoload.php): failed to open stream: No such file or directory in /var/www/html/mydomain/get_oauth_token.php on line 59, referer: http://mydomain.com/get_oauth_token.php

If you have received your refresh token, congratulations: the painful part is over. You can just go to the PHPMailer Github page and fill out their OAUTH2 example (gmail_xoauth.phps), and it ought to just work. If all you needed to do is send mail from a project on your VPS, you’re more or less ready to move on to more interesting parts of your project:

$email = 'someone@gmail.com';
$clientId = 'RANDOMCHARS-----duv1n2.apps.googleusercontent.com';
$clientSecret = 'RANDOMCHARS-----lGyjPcRtvP';
//Obtained by configuring and running get_oauth_token.php
//after setting up an app in Google Developer Console.
$refreshToken = 'RANDOMCHARS-----DWxgOvPT003r-yFUV49TQYag7_Aod7y0';

Remember to clean up any unnecessary scripts that contain your refresh token and other sensitive data before continuing.

ESP8266: We Don’t Need No Stinking Servers

Now what if we wanted to use these tokens to send email directly from project on a Raspberry Pi without needing a server in the middle? It turns out that once we have the client ID, client secret, and refresh token, we no longer require the server and domain name we’ve been using so far, and a mail-sending application, e.g. PHPMailer, can be installed on a computer anywhere with Internet access as long as it is configured with those values.

Things get a little more complicated when we try to do this on an ESP8266. OAUTH2 requires that we use SSL, and access tokens regularly expire and need to be refreshed. Thankfully, [jalmeroth] generously wrote a proof-of-concept and published it on GitHub. If provided with an access token, it can access your Gmail account and use it to send an email. It can also directly update/get data from Google Sheets, but I didn’t test this. However, if the access token was expired, it couldn’t detect that, although it did include working code to actually request a new token, but not parse it out and use it.

In an attempt to add to the functionality of that proof of concept, I forked the project and made a few changes. First, I changed to order of operations in the code to make it check if the current access token was valid before doing anything else. Second, Google API was responding ‘400 Bad Request’ if the access token was invalid, and everything but ‘200 OK’ responses were being filtered out by the code. Finally, I wrote a couple of JSON parsers that check the reason for the ‘400 Bad Request’ and extract and use the access token returned by Google API when a new one is requested.

It works, but it’s hardly reliable – not surprising considering I’ve never really used the Arduino platform before. Notably, the SHA1 fingerprint for Google API fails often. Checking from my local machine, the SHA1 fingerprint varies between two signatures there too. It would be fairly easy to check for either of them, or just keep trying, but I’d rather understand what’s going on first. (Is it just a CDN or something else?) Or perhaps I should rewrite the whole application in Lua where I’m more competent.

A fun little application built on the above was to place a button on my office that sends an email to my phone. I don’t want people to contact me at that email address frivolously, but do want to know immediately if someone is waiting outside my office. The big red button is for normal requests, but urgent requests require lockpicking. If it’s urgent it better also be interesting.

Finally, did you know that Hackaday provides an API for accessing hackaday.io? It uses the simpler OAUTH (not OAUTH2) authentication, so should be more straightforward than the above to implement on the ESP8266. Have any of you used it?

This Coin Cell Can Move That Train!

$
0
0

[Mike Rigsby] has moved a train with a coin cell. A CR2477 cell to be exact, which is to say one of the slightly more chunky examples, and the train in question isn’t the full size variety but a model railroad surrounding a Christmas tree, but nevertheless, the train moved.

A coin cell on its own will not move a model locomotive designed to run on twelve volts. So [Mark] used a boost converter to turn three volts into twelve. The coin cell has a high internal resistance, though, so first the coin cell was discharged into a couple of supercapacitors which would feed the boost converter. As his supercaps were charging, he meticulously logged the voltage over time, and found that the first one took 18 hours to charge while the second required 51 hours.

This is important and useful data for entrants to our Coin Cell Challenge, several of whom are also going for a supercap approach to provide a one-off power boost. We suspect though that he might have drawn a little more from the cell, had he selected a dedicated supercap charger circuit.

Viewing all 4677 articles
Browse latest View live


Latest Images